
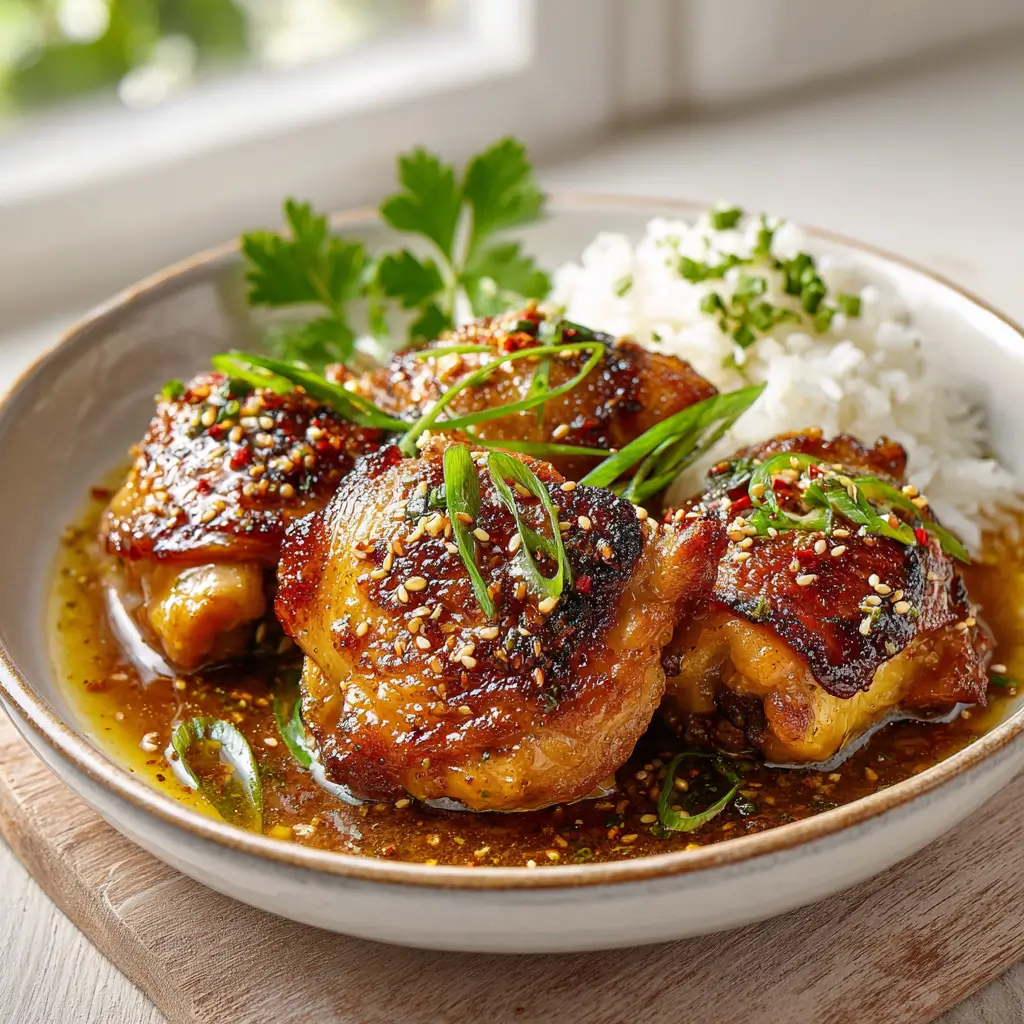
If you need a dinner that feels comforting but still comes together without a lot of fuss, these crispy honey garlic chicken thighs are a wonderful choice. The chicken turns golden and juicy, then gets coated in a glossy sweet-savory sauce that makes every bite irresistible.
Crispy Honey Garlic Chicken
Equipment
- 1 Large Skillet
- 1 Mixing Bowls
- 1 Tongs
Ingredients
- 2 pounds boneless or bone-in chicken thighs
- 1 cup cornstarch
- 1 teaspoon salt
- 0.5 teaspoon black pepper
- 1 teaspoon garlic powder
- 0.5 cup all-purpose flour optional, for extra crispness
- 2 eggs beaten
- 0.5 cup oil for frying or pan-searing
- 0.5 cup honey
- 4 cloves fresh garlic minced
- 0.25 cup soy sauce
- 0.25 cup chicken broth
- 2 tablespoons rice vinegar
- 1 tablespoon sesame seeds optional, for garnish
- 2 green onions sliced, for serving
Instructions
- Pat the chicken thighs dry, then season them with salt, black pepper, and garlic powder. Dry chicken helps the coating stick better and crisp up nicely.
- Set up a simple breading station with beaten eggs in one bowl and a mixture of cornstarch, and flour if using, in another. Dip each piece of chicken into the egg, then press it into the dry coating until well covered.
- Warm oil in a large skillet over medium heat. Cook the chicken in batches so the pan does not get crowded, then let each piece turn deep golden and crisp on both sides. Transfer to a plate while you make the sauce.
- In the same skillet, add the garlic and cook briefly until fragrant. Stir in the honey, soy sauce, chicken broth, and rice vinegar, then let it simmer until slightly thickened and glossy.
- Return the chicken to the skillet and spoon the sauce over each piece until coated. Finish with sesame seeds and green onions, then serve right away while the chicken is still crisp.
Notes
Why You’ll Love This Crispy Honey Garlic Chicken
This dish is the kind of weeknight recipe that earns a spot in regular rotation. It uses simple pantry ingredients, the sauce comes together quickly, and the chicken stays tender under that crisp coating. I also love that it feels a little special, even on a busy night.
Crispy Honey Garlic Chicken Ingredients & Substitutions
- Chicken thighs, boneless or bone-in, for juicy and flavorful results
- Cornstarch, helps create a crisp coating
- Salt and black pepper, for seasoning
- Garlic powder, adds extra savory flavor
- All-purpose flour, for a light crust, optional if you want extra crispness
- Eggs, to help the coating stick
- Oil, for frying or pan-searing
- Honey, for sweetness and shine
- Fresh garlic, minced for the sauce
- Soy sauce, adds depth and saltiness
- Chicken broth, for balance in the sauce
- Rice vinegar, for a gentle tang
- Sesame seeds, optional for garnish
- Green onions, sliced for serving
If you want a lighter coating, skip the flour and use cornstarch only. You can also swap chicken thighs for chicken breasts, but watch the cooking time closely so they stay juicy.
Step-by-Step Instructions to Make Crispy Honey Garlic Chicken
1. Season the chicken
Pat the chicken thighs dry, then season them with salt, black pepper, and garlic powder. Dry chicken helps the coating stick better and crisp up nicely.
2. Coat the chicken
Set up a simple breading station with beaten eggs in one bowl and a mixture of cornstarch, and flour if using, in another. Dip each piece of chicken into the egg, then press it into the dry coating until well covered.
3. Cook until golden
Warm oil in a large skillet over medium heat. Cook the chicken in batches so the pan does not get crowded, then let each piece turn deep golden and crisp on both sides. Transfer to a plate while you make the sauce.
4. Make the honey garlic sauce
In the same skillet, add the garlic and cook briefly until fragrant. Stir in the honey, soy sauce, chicken broth, and rice vinegar, then let it simmer until slightly thickened and glossy.
5. Coat and serve
Return the chicken to the skillet and spoon the sauce over each piece until coated. Finish with sesame seeds and green onions, then serve right away while the chicken is still crisp.
Tips for Success
Keep the chicken pieces similar in size so they cook evenly. Do not skip drying the chicken before coating, since moisture can make the crust soft. If the sauce thickens too much, add a splash of broth to loosen it.
For the crispiest texture, avoid turning the chicken too early in the pan. Let it develop a good crust before flipping, and make sure the oil is hot enough before the first batch goes in.
Variations of Crispy Honey Garlic Chicken
You can add a pinch of red pepper flakes for heat, or stir in a little grated ginger for extra brightness. If you like a sesame flavor, finish the sauce with a drizzle of toasted sesame oil. For a sticky glaze with more depth, add a spoonful of brown sugar along with the honey.
Serving Suggestions: What to Pair with Crispy Honey Garlic Chicken
This chicken is excellent with steamed rice, garlic noodles, or mashed potatoes to soak up the sauce. A simple vegetable side like broccoli, green beans, or a crisp cucumber salad works beautifully alongside it.
Storage & Reheating Instructions
Store leftovers in an airtight container in the refrigerator for up to 3 days. To reheat, warm the chicken in a skillet over low heat with a small splash of broth, or use the oven to help keep the coating crisp. The microwave works too, but the crust will soften a bit.
Memories Made Around the Table
This is the kind of meal that tends to bring everyone to the table fast. The smell of garlic and honey warming in the pan always feels inviting, and it has a way of turning an ordinary evening into something a little more memorable.
FAQs
Can I bake the chicken instead of frying it?
Yes, you can bake it on a lined sheet pan until cooked through and crisp, then toss it with the sauce. It will be a little less crunchy than pan-fried, but still delicious.
Can I use chicken breasts?
Yes, chicken breasts work well, but they cook faster than thighs. Slice them evenly and check for doneness so they do not dry out.
How do I keep the coating crispy?
Cook in batches, avoid overcrowding the pan, and serve soon after saucing. If you want extra crunch, spoon the sauce over just before serving rather than letting the chicken sit in it too long.
Can I make the sauce ahead of time?
Yes, the sauce can be mixed ahead and stored in the refrigerator. Rewarm it gently before adding it to the chicken.
Final Thoughts
These crispy honey garlic chicken thighs are everything I want in an easy weeknight dinner, simple to make, full of flavor, and satisfying every time. If you love a sweet-savory chicken recipe with a crisp finish, this one is worth keeping close.